
ScreenRetriever Windows PC and Tablet Monitoring Tool: Install/Use Guide
LiveView and Replay are supported on:
- Windows 10
- Windows 8 (32 bit and 64 bit editions)
- Windows 7 (32 bit and 64 bit editions)
- Vista Service Pack 2 (32 bit and 64 bit editions)
- XP Service Pack 3
Start to monitor kids internet activity today, so that you can keep your kids on the path to success!
This ScreenRetriever guide will show you how easy it is to use ScreenRetriever LiveView or Replay to check in on your child’s computer activity, both online and offline, at any time to teach safe, appropriate, responsible online behavior, where ever your child’s computer is located in your home. ScreenRetriever is transparent, your child knows it’s being used.
Installation Guide:
This is an easy standard installation and one time set up. You will need to install ScreenRetriever on both the parent’s and child’s computer for it to work.
- 1. Click on the Free Trial button

Click on The Free Trial Button
- 2. On the “Free Trial” page enter your email address in order to download the program. After you click the “Submit” button the program will download automatically.

- 3. Once ScreenRetriever is downloaded open it up and it will ask you to create a password and enter an email address. This password is for you to know, not your child. It grants access to the entire ScreenRetriever Control Panel. Meaning, if your child knows the password, they can disable the program on their computer. Make sure that you save in a safe place the passwords for each computer that you install ScreenRetriever on.

Create Password for Parent’s Eyes Only.
- 4. ScreenRetriever will then ask if you want to “view” this computer from other computers on your wireless network. Before you proceed, know that ScreenRetriever needs to be installed on YOUR computer and YOUR CHILD’s computer in order for it to work properly.
So… when installing on your computer, choose No.

When installing on your child’s computer, choose Yes.

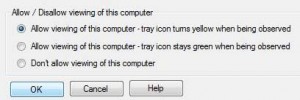
- 5. The same goes for the next pop up. On your computer, choose “Don’t allow viewing of this computer” On your child’s computer, choose one of the first two “Allow viewing of this computer”
Choose yellow
- if you want your child to know when you’re checking in on their computer activity. (We recommend that kids know your checking-in so that trust is maintained between you and your child.)
Choose green
- if you don’t want your child to know exactly when you’re checking in, however the icon always remains in your child’s tool tray so they know ScreenRetriever is being used.
- 6. The next pop up asks if you would like to record the computer’s activity. On your computer say no. On your child’s computer say yes.

Congratulations! You’re done with the installation! Make sure that you’ve followed the same steps on your child’s computer. A control panel icon has been placed on your desktop! The Control Panel allows you to control all available functions, including screen recording and live viewing. Now let’s get you familiar with the Control Panel.
Control Panel: To start the remote viewing of your child’s computer click the “Screen Retriever Control Panel” icon on your desktop. The Control Panel allows you to control all available functions, including screen recording and live viewing.See the Live Viewing Guide and the Replay Guide below.
ScreenRetriever LiveView Guide:
- Click on the ScreenRetriever Control Panel – then:
- 1. Click the “view another computer” button.
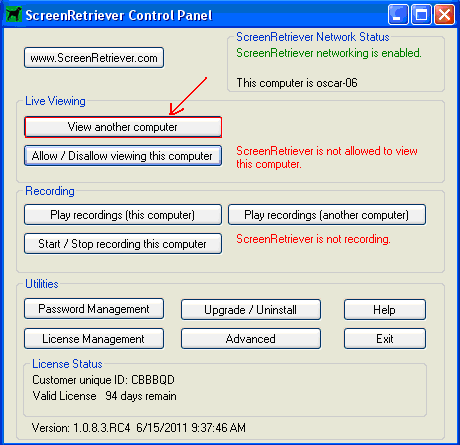
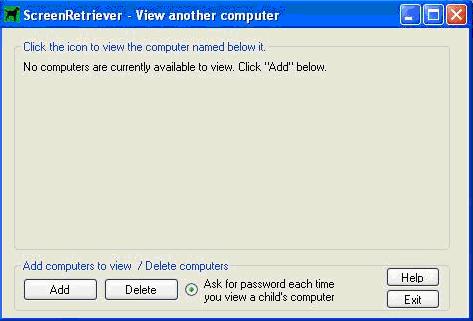
- This will take you to a menu where you can choose the computer(s) you want to view. Remember, you can only view computers that are on the same wireless network as your computer and have the software installed on them. This is the only way the ScreenRetriever software works.
- 2. Click the “Add” button on the lower left-hand corner of the menu.
- The next screen shows ScreenRetriever finding your child’s computers on your home network.
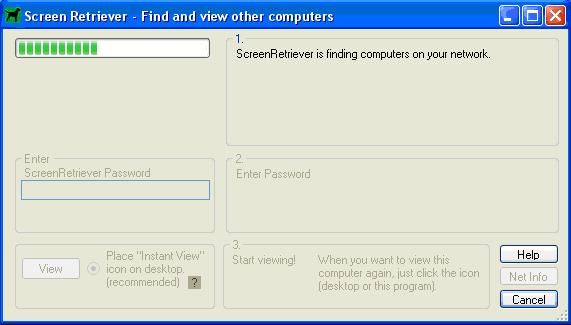
- 3. On the next screen, choose the computer you wish to add. Then click the “View” button which is on the lower left-hand corner of the menu.
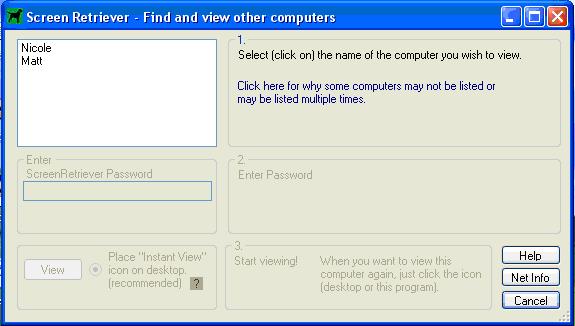
- After you click on the child’s computer you wish to view, enter the password. Now your child’s computer screen will open on your computer screen so that you may see exactly what your child is seeing on their screen to teach your children safe, appropriate, responsible behavior.
- 4. Notice the L and S buttons on the top left of your child’s screen. If you click on the S button, (red arrow), your child’s window will shrink and you may pull it to the side of your computer screen. When you would like to take a closer look, you may click on the L button,(yellow arrow).
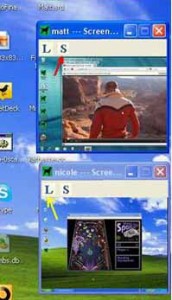
Click on the S or L buttons to shrink or enlarge the screen
ScreenRetriever Replay Guide:
- Click on the ScreenRetriever Control Panel,then:
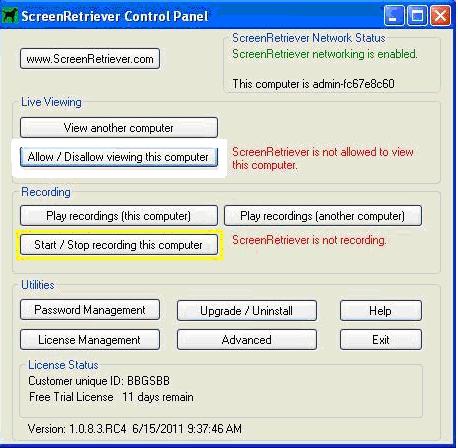
- 1. If you wish to record your child’s computer activity to view at a later date, you will need to go on your child’s computer, open the ScreenRetriever Control Panel there, and click the “Start/Stop recording this computer” button which is highlighted in yellow in the screenshot below.
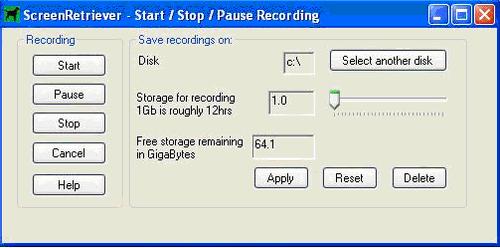
- 2. This will take you to a menu that allows you to start, pause, and stop recording. (At any time that you wish to stop recording, you can go back to your child’s computer and click the “Stop” button (shown below).
- – The right side of this screen shows the amount of storage to allocate for recordings. You can leave it as is and click apply,unless you changed the settings on your child’s computer. The storage settings should be the same on your computer and your child’s computer.
- 3. When you wish to play recordings, click “play recordings another computer” (red arrow)
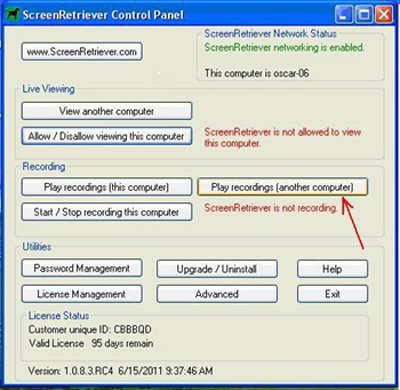
- 4. Click on the icon of the child’s computer you wish to replay recordings.
![]()
- 5. Enter your password.
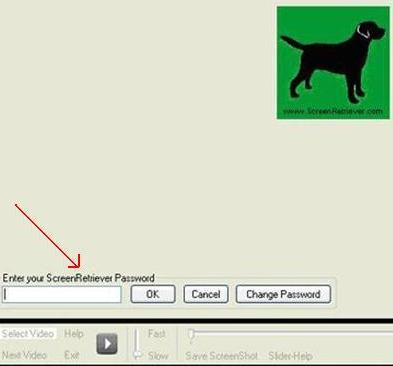
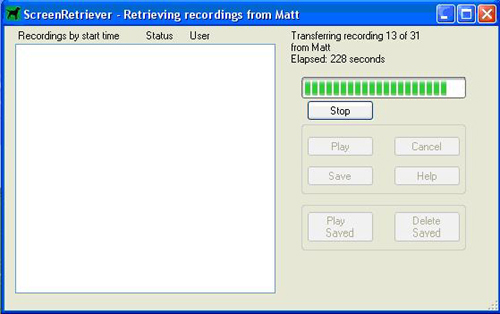
- 6. You will now see a screen that shows your child’s recordings being transferred to your computer.
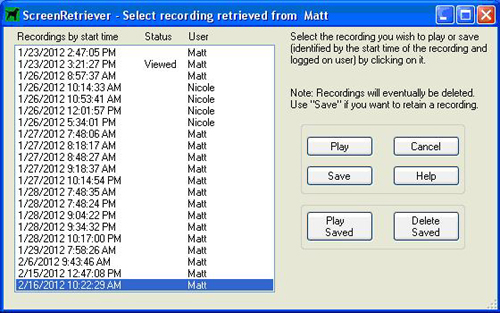
- 7. Click select video on the next screen.
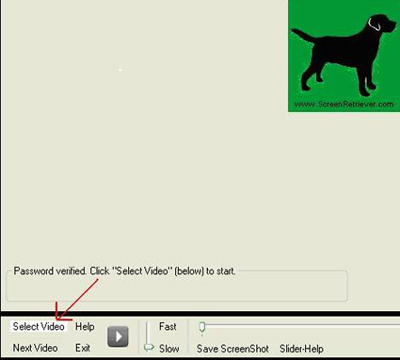
- 8. Select recording to view. Click Play. You may also save a recording.
- We wish you success using ScreenRetriever Replay to check in on your child’s online world, to help keep your children out of harms way and teach safe, appropriate, responsible computer behavior.
- For Solutions to common problems please refer to the


